Blog

  • Main Difference Between a Gas Dryer and an Electric Dryer

    Main Difference Between a Gas Dryer and an Electric Dryer

    The core difference comes down to how each type generates heat. Gas dryers burn natural gas or propane through a burner assembly, while electric dryers rely entirely on an electric heating element. That single distinction shapes almost everything else, installation requirements, running costs, drying speed, and even the specific home appliance repair issues each type tends to develop over time.

    How They Generate Heat

    A gas dryer uses a small burner, ignited electronically in most modern models, to heat air that’s then circulated through the drum. This requires a gas line connection in addition to standard electrical power, since the drum motor, timer, and controls still run on electricity even though the heat itself comes from combustion, an important distinction to understand before any home appliance repair or installation decision.

    An electric dryer runs entirely on electricity, using a heating element, essentially a large coil, to warm the air pulled into the drum. No gas line is involved anywhere in the process, which simplifies installation considerably in homes that don’t already have a gas hookup near the laundry area.

    Installation Requirements

    This is often the deciding factor before efficiency or cost even enter the conversation. Electric dryers need a dedicated 240 volt outlet, which most homes already have in the laundry area, but if not, adding one is a straightforward electrical job. Gas dryers need both a 120 volt outlet for the motor and controls, and a nearby gas line with a shutoff valve, which is a bigger undertaking if your home doesn’t already have gas plumbed to that location.

    Homes without existing gas service to the laundry area face a meaningfully larger upfront cost running a new gas line, sometimes significant enough to make an electric dryer the more practical choice regardless of any other consideration.

    Running Costs

    Gas dryers are generally cheaper to operate over time in most regions, since natural gas typically costs less per unit of heat generated than electricity does. The exact savings vary considerably by location and current utility rates, but households running a dryer several times a week often notice a real difference on the monthly bill.

    Electric dryers cost more to run per cycle in most markets, though the gap has narrowed somewhat in areas with lower electricity rates or higher gas prices. Anyone comparing the two seriously should check current local rates for both utilities rather than relying on general assumptions, since the math genuinely shifts by region.

    Drying Speed and Performance

    Gas dryers tend to heat up faster and reach higher temperatures more quickly than electric models, which can translate to modestly shorter drying times for the same load. The difference isn’t dramatic for most everyday laundry, but it becomes more noticeable with bulky items like comforters or towels that take longer to dry regardless of dryer type.

    Electric dryers heat more gradually, and while the difference in total drying time is often small, some people notice slightly more consistent, gentler heat distribution as a result, which can matter for delicate fabrics run on lower heat settings.

    Common Repair Differences

    This is where the two types genuinely diverge in terms of what tends to go wrong. Gas dryers have components electric models simply don’t, an igniter, a gas valve solenoid, and a burner assembly, all of which can fail independently and require parts specific to gas models. A gas dryer that won’t heat is often dealing with a failed igniter, a relatively common and moderately affordable repair.

    Electric dryers most commonly run into heating element failures, since that single component does all the work electric heat generation requires. A heating element that’s burned out produces a dryer that runs and tumbles normally but simply doesn’t heat, similar in symptom to a gas dryer’s igniter failure but with an entirely different fix.

    Both types share plenty of the same wear points regardless of heat source, belts, drum rollers, lint traps, and moisture sensors all fail the same way whether the dryer is gas or electric, so a fair amount of appliance repair work overlaps between the two despite their different heating systems.

    Safety Considerations

    Gas dryers carry a small additional risk profile tied to the gas line itself; a leak or improperly vented burner poses a genuine safety concern that electric dryers simply don’t have. Proper venting outside the home is essential for gas dryers specifically, beyond just removing lint and moisture, since combustion byproducts need a clear path out as well.

    Electric dryers avoid this particular risk entirely, though they still carry standard fire risk from lint buildup like any dryer type, which is why regular lint trap and vent cleaning matters regardless of which one you own.

    Which One Should You Choose?

    If your home already has gas service nearby and you run the dryer frequently, a gas dryer likely pays for its typically higher upfront cost through lower running costs over several years. If your home doesn’t have gas plumbed to the laundry area, or you simply prefer to avoid combustion appliances in the house, an electric dryer avoids installation complexity and the safety considerations unique to gas, often meaning simpler home appliance repair down the line as well.

    Summary

    Gas and electric dryers differ mainly in how they generate heat, which cascades into different installation requirements, running costs, and the specific components that tend to fail over time. Neither is universally better; the right choice depends heavily on your home’s existing utility setup and how often you’re running loads. Appliances Repair Blog covers troubleshooting for both types, so whichever heat source your dryer uses, home appliances repair guidance is available when something needs attention.
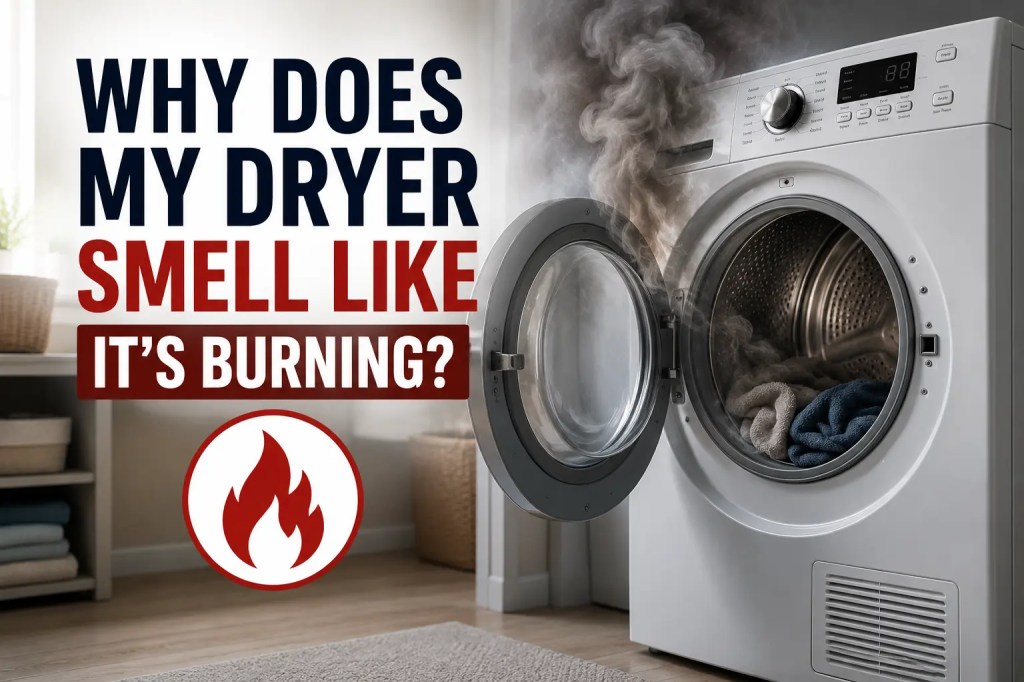

  • Why Does My Dryer Smell Like It’s Burning?

    Why Does My Dryer Smell Like It’s Burning?

    A burning smell from the dryer is one of the few appliance issues that deserves immediate attention rather than a wait and see approach. In most cases, it traces back to lint buildup, a failing belt, or a worn bearing, but a persistent burning smell always warrants stopping the dryer and checking before running another load, since this is one of the more common causes of appliance repair calls that started as something small.

    Stop and Check Before Anything Else

    If you notice a burning smell, turn the dryer off immediately rather than letting the current cycle finish. Unplug it if you can do so safely, or switch off the breaker for hardwired units. This isn’t overly cautious, dryers are one of the leading causes of house fires among home appliances, and lint is highly flammable. A few minutes of caution costs you nothing, and it’s far cheaper than the home appliances repair or replacement that follows an actual fire.

    Lint Buildup Is the Most Common Cause

    An overwhelming share of burning smell complaints come down to lint, either in the trap, the vent, or built up inside the dryer’s internal housing where it’s not visible during normal cleaning. Lint sitting too close to the heating element can scorch slightly during a cycle, producing exactly the burning smell people describe.

    Clean the lint trap thoroughly, including scrubbing it with soapy water if there’s a filmy residue that a quick wipe won’t remove. Check the exhaust vent for blockages along its entire length, not just at the connection point, since lint accumulates gradually the further it travels from the trap.

    A New Dryer Smell Isn’t Always Bad

    Worth noting: a brand new dryer, or one that hasn’t been used in a while, often produces a mild burning or chemical smell during its first few cycles as manufacturing residue or dust burns off the heating element. This typically fades within a few uses and isn’t something to worry about, provided it’s mild and genuinely diminishing each time you run it.

    A Worn or Slipping Belt

    The belt that turns the drum can develop friction against the drum or motor pulley as it wears thin or loses tension, producing a rubbery burning smell distinct from the dusty smell of burning lint. This is often accompanied by a squealing noise, since a slipping belt tends to make noise and produce heat at the same time.

    Belt replacement is a moderately involved repair, requiring access to the dryer’s internals, and while some people handle it themselves with the right guide for their specific model, it’s also a common and reasonably priced job for a technician if you’d rather not open the cabinet.

    Worn Drum Bearings or Rollers

    Dryers use rollers or bearings to support the drum as it spins, and these wear down gradually over years of use. When they wear enough, metal-on-metal or plastic-on-metal contact can generate friction heat and a distinct burning smell, often paired with a grinding or squeaking noise during operation.

    This repair varies significantly in difficulty depending on the model, and it’s another one where getting a second opinion from a technician before attempting it yourself is a reasonable call, particularly if you’re not confident diagnosing exactly which component is worn.

    Electrical Issues

    A burning smell that seems more like burning plastic or an electrical smell, rather than dusty or rubbery, is a more serious sign. This can point to a wiring issue, a failing motor, or a problem with the heating element itself overheating beyond normal operation.

    Electrical smells are not something to keep testing by running more cycles. If the smell doesn’t clearly match lint or a mechanical belt issue, and especially if it’s accompanied by sparking, smoke, or a tripped breaker, unplug the dryer and treat it as a genuine safety concern rather than routine troubleshooting.

    Something Left in the Dryer

    Occasionally the cause is much simpler than a mechanical fault. A stray item, a crayon, a piece of plastic, something that melted against the drum or heating element, can produce a burning smell that has nothing to do with the dryer’s internal components at all. Check the drum thoroughly, along with the lint trap area, for anything that shouldn’t be there before assuming a mechanical cause.

    When to Call a Technician Immediately

    Any burning smell paired with visible smoke, sparks, or a breaker that keeps tripping means stop using the dryer entirely and call a technician rather than continuing to troubleshoot. For smells that seem clearly tied to lint or a worn belt, without any of these additional warning signs, it’s reasonable to work through the checks above first before deciding whether appliance repair is genuinely needed.

    Summary

    A burning smell from the dryer usually comes down to lint buildup, a worn belt, aging drum bearings, or occasionally something accidentally left inside, though a smell that seems electrical rather than dusty or rubbery deserves more caution. Stopping the dryer immediately and checking the obvious causes first resolves most of these without any lasting damage. Appliances Repair Blog is here to help you figure out what’s normal, what needs a quick DIY fix, and what genuinely calls for home appliances repair before you run another load.

  • Microwave Making Loud Noises? What It Means

    Microwave Making Loud Noises? What It Means

    A microwave that suddenly starts humming loudly, buzzing, or grinding usually points to one of a few specific components: the turntable motor, the stirrer fan, the magnetron, or a worn drive coupler underneath the glass tray. Most of these don’t require home appliance repair right away; a few minutes of checking can tell you which one you’re actually dealing with.

    Grinding or Scraping Noises

    This is almost always mechanical, and almost always related to the turntable. Underneath the glass tray sits a small plastic roller ring and a motor coupler that turns it. If debris, dried food, or a warped roller ring is causing friction against the tray or the cavity floor, you’ll hear a grinding or scraping sound each time the tray rotates, one of the simpler issues on this list and rarely something that needs home appliances repair beyond a quick clean.

    Remove the tray and roller ring, wash both thoroughly, and check the roller ring for cracks or flat spots from wear. Reinstall and run the microwave empty for a few seconds to see if the noise persists. This fixes the vast majority of grinding complaints without needing any parts replaced.

    Loud Humming or Buzzing

    Some humming during operation is completely normal, microwaves aren’t silent appliances. The concern is a hum that’s noticeably louder than usual, or one that’s new and wasn’t there before. This often points to the magnetron, the component that actually generates the microwaves used for cooking, beginning to wear out.

    A failing magnetron typically shows other symptoms alongside the noise, like food taking noticeably longer to heat than it used to. If both are happening together, that’s a stronger signal that something inside has genuinely degraded rather than just needing a clean.

    A buzzing sound specifically, as opposed to a steady hum, can also point to the high voltage diode or capacitor, components involved in powering the magnetron. These parts carry dangerous voltage even after the microwave is unplugged, and this is one area where DIY investigation is genuinely not worth the risk.

    Rattling Sounds

    A rattle usually means something loose, either inside the cavity itself or, less commonly, inside the housing around the fan or motor. Check first for anything that fell into the cavity, a stray utensil, food debris, or a piece of the roller ring that’s come apart.

    If the cavity is clear and the rattle continues, it may be coming from the exhaust fan or the stirrer fan, the small fan responsible for distributing microwaves evenly throughout the cavity. A fan blade that’s become loose or slightly bent can create a rattling or clicking sound as it spins.

    A Loud Clicking Sound

    Occasional clicking during startup or shutdown is often just the relay switching, a normal mechanical sound in many models. Rapid, repeated clicking throughout the entire cooking cycle is different and can point to the door switch or interlock system struggling to stay engaged properly.

    Since these switches are directly tied to the microwave’s safety systems, preventing it from running with the door open, this is another area where opening up the unit yourself isn’t advisable. A microwave with a genuinely failing interlock system should be looked at by a technician before continued use.

    Vibrating or Shaking Sounds

    A microwave that seems to vibrate more than usual, especially a countertop model, sometimes just means it’s not sitting level or has shifted slightly on an uneven surface. Check that it’s resting flat and stable, and that nothing underneath is creating an uneven surface.

    If it’s securely placed and still vibrating excessively, an unbalanced turntable, from an improperly seated tray or a warped roller ring, is the next most likely explanation, and it circles back to the same fix as grinding noises above.

    When a Noise Means Stop Using It Immediately

    Sparking sounds combined with visible arcing inside the cavity, a burning smell, or smoke are not noises to troubleshoot casually. Turn the microwave off and unplug it immediately if any of these occur. Metal accidentally left inside, a damaged interior coating, or a genuinely failing magnetron can all cause this, and continued use risks real damage to the appliance or a safety hazard in the kitchen.

    Which Noises Are Safe to Investigate Yourself

    Grinding from the turntable, occasional rattling from loose debris, and normal operational humming are all safe to check and often fix yourself with basic cleaning. Anything involving the magnetron, high voltage components, or the door interlock system carries real electrical risk and is squarely in home appliances repair territory rather than a DIY project, regardless of how confident you feel opening things up.

    Summary

    Most microwave noises trace back to something mechanical and simple, a dirty roller ring, loose debris, or a turntable that isn’t seated properly, and these are easy fixes anyone can handle. Noises tied to the magnetron, high voltage components, or the door safety system are a different story entirely and call for a technician rather than a screwdriver. Appliances Repair Blog covers the rest of what your microwave might be telling you, and when a sound is worth a home appliances repair call instead of a DIY attempt.

  • Simple Home Appliance Maintenance Checklist For Every Season

    Simple Home Appliance Maintenance Checklist For Every Season

    Most major appliance failures don’t happen out of nowhere. They build up gradually from small maintenance tasks that get pushed off for months at a time. Spreading a handful of checks across the four seasons keeps everything running smoothly without turning home appliance repair into a once a year scramble. Here’s a practical breakdown of what to check and when.

    Why Seasonal Timing Actually Helps

    Tying maintenance to the seasons works better than a vague once a year reminder because appliance usage genuinely shifts throughout the year. The dryer works harder in winter when clothes can’t line dry outside. The refrigerator’s compressor works harder in summer heat. Spreading tasks out this way also keeps any single maintenance session short, ten or fifteen minutes per appliance rather than an overwhelming weekend project, and it’s often what separates routine upkeep from an unexpected home appliances repair bill later on.

    Spring Checklist

    Spring is a good time to focus on anything that’s been quietly working overtime through winter.

    Check the dryer vent and clean it thoroughly if it’s been months since the last time, since heavier winter drying use tends to pack more lint into the exhaust path than usual. Inspect refrigerator door seals for cracking or gaps, since a fridge losing cold air has to work harder as outdoor temperatures start climbing. Clean the dishwasher filter and run an empty cycle with a dishwasher cleaner to clear out any buildup from winter holiday cooking. Vacuum the coils behind or underneath the refrigerator, since dust accumulation here forces the compressor to work harder and shortens its lifespan over time.

    Summer Checklist

    Summer puts extra strain on anything dealing with heat and moisture.

    Check the refrigerator’s temperature settings and confirm it’s actually holding the recommended range, since warmer ambient kitchen temperatures in summer can push an aging unit to struggle more than it would the rest of the year. Clean the range hood filter, since summer often means more grilling and cooking that puts extra grease through the kitchen ventilation system. Inspect washing machine hoses for any bulging or wear, particularly if the machine’s been running more loads from sweatier laundry and increased activity. Clear lint and debris from the dryer’s exterior vent flap outside the house, checking that it opens and closes freely.

    Fall Checklist

    Fall is the point to prepare everything for heavier indoor appliance use as the weather turns.

    Deep clean the oven, including checking the door seal, before the heavier baking season that typically comes with cooler weather. Test the dryer’s moisture sensor by wiping it down with a cloth dampened in rubbing alcohol, since residue buildup here is one of the most common causes of unnecessarily long drying cycles. Check the water inlet valve and hoses on the dishwasher and washing machine for any wear, since these tend to get less attention through the busier summer months. Clean the vacuum’s filter and check the brush roll, since carpets tend to pick up more incoming debris as people track in leaves and outdoor mess.

    Winter Checklist

    Winter tends to mean heavier reliance on a smaller set of appliances, so those deserve the closest attention.

    Clean the dryer’s lint trap and vent more frequently than usual, since indoor drying largely replaces any outdoor line drying during colder months. Check the refrigerator door seal again, since indoor heating dries out rubber gaskets faster than people expect, causing them to crack or lose their grip over a single winter season. Inspect the dishwasher’s spray arms for clogs, since holiday cooking and entertaining typically means significantly more dishwashing than the rest of the year. Vacuum more frequently if pets are spending more time indoors, and clean the vacuum’s brush roll on a shorter cycle to match the heavier use.

    A Few Tasks Worth Doing Every Season

    Some checks are worth repeating regardless of the time of year rather than being tied to a single season. Wipe down door seals and gaskets on the refrigerator, dishwasher, and washing machine, since these wear gradually year round. Check for unusual noises across every major appliance, since catching a new sound early almost always means a cheaper fix than waiting for it to become a full breakdown. Keep an eye on utility bills for unexplained increases, since a struggling appliance often shows up there before it fails outright.

    Building This Into an Actual Habit

    The easiest way to stick with a seasonal checklist is tying it to something you’re already doing, the start of a new season, a holiday weekend, or a recurring calendar reminder every few months. Trying to remember appliance maintenance without any anchor point is exactly how it gets forgotten for a full year at a time.

    When Maintenance Uncovers a Real Problem

    Not everything on this checklist stays a quick fix. If you spot a cracked hose, a seal that’s beyond simple cleaning, or a noise that sounds mechanical rather than cosmetic, that’s the checklist doing its job by catching something early rather than letting it turn into a full breakdown. Addressing it promptly, whether it’s a DIY fix or a call for home appliances repair, is almost always cheaper and easier than waiting until the appliance fails completely.

    Summary

    A simple seasonal rhythm, spring, summer, fall, and winter, spreads appliance maintenance into manageable chunks instead of letting everything pile up unnoticed. Most of these checks take only a few minutes per appliance, and together they catch small issues long before they turn into expensive repairs or full replacements. Appliances Repair Blog covers the deeper troubleshooting for anything this checklist happens to uncover, so whatever the season brings, home appliances repair guidance is always close by.

  • Difference Between A Robot Vacuum And A Traditional Vacuum

    Difference Between A Robot Vacuum And A Traditional Vacuum

    The core difference comes down to autonomy versus power. Robot vacuums clean on their own, on a schedule, with modest suction. Traditional vacuums need a person pushing them but deliver noticeably stronger cleaning performance. Neither one requires home appliances repair expertise to choose correctly, just an honest look at how your home actually gets dirty and how much involvement you want in the process.

    How Each One Actually Cleans

    A robot vacuum navigates a room using onboard sensors, cameras, or laser mapping, moving in patterns designed to cover as much floor as possible without a person directing it. It runs on a rechargeable battery, docks itself to recharge, and can be scheduled to clean daily without anyone touching it, one of the few areas of home appliances repair and maintenance that’s largely automated by design.

    A traditional vacuum, whether upright, canister, or cordless stick, relies entirely on a person pushing or guiding it, adjusting settings for different surfaces, and manually working it into corners and under furniture as needed. What it lacks in independence, it makes up for in raw suction power and consistent contact pressure against carpet fibers.

    Suction Power Isn’t Close

    This is the single biggest practical difference. Traditional vacuums, particularly uprights and canisters, generate substantially more suction than robot vacuums, which are constrained by battery size and a compact motor that has to fit inside a low profile disc. On thick carpet or heavily soiled areas, that suction gap becomes obvious fast.

    Robot vacuums handle daily maintenance on hard floors and light carpet well. They struggle noticeably more with deep pile carpet, large debris, or genuinely dirty floors that require real agitation and airflow to clean properly.

    Coverage and Accessibility

    Robot vacuums can’t climb stairs, full stop, which means multi level homes need a separate solution for anything beyond the floor the robot lives on. They also struggle with loose cables, low furniture clearance, and cluttered floors, sometimes getting stuck or simply avoiding areas a person would have no trouble reaching with a hose attachment.

    Traditional vacuums go wherever you take them, stairs included, and attachments extend their reach into upholstery, curtains, and tight corners that a robot vacuum’s fixed low profile design can’t access at all.

    Time and Effort

    This is where robot vacuums genuinely win. Once set up and scheduled, a robot vacuum cleans without anyone lifting a finger, which adds up to real time saved over weeks and months, particularly in households where daily floor maintenance would otherwise get skipped entirely.

    Traditional vacuums require someone to set aside time, pull the machine out, and actually run it, which for busy households often means floors get cleaned less frequently than they’d like, even with a perfectly good vacuum sitting in the closet.

    Maintenance Differences

    Robot vacuums need their own upkeep. Brushes and sensors need regular cleaning, the battery degrades over years and eventually needs replacing, and dust bins are typically much smaller, requiring more frequent emptying than a traditional vacuum’s larger canister or bag.

    Traditional vacuums need filter cleaning, bin emptying, brush roll maintenance, and occasional belt replacement, generally on a less frequent basis than a robot vacuum’s smaller components, but each individual maintenance task tends to take a bit more hands on effort.

    Price Comparison

    Entry level robot vacuums start relatively affordable, but genuinely capable models with strong mapping and decent suction climb toward the price of a mid range traditional vacuum, sometimes well past it for premium self emptying models. Traditional vacuums span an equally wide range, from budget uprights to premium canister and stick models, so price alone isn’t a reliable way to pick between the two categories; comparing features and expected suction matters far more than the number on the box.

    Which One Should You Choose?

    Robot vacuums suit households with mostly hard floors or low pile carpet, minimal stairs, and a preference for hands off, scheduled maintenance over deep, thorough cleaning. Traditional vacuums suit households with thicker carpet, multiple floors, pets that shed heavily, or anyone who wants the strongest possible clean rather than convenient upkeep.

    Why Many Households Choose Both

    A growing number of people don’t pick one over the other, they use a robot vacuum for daily maintenance and a traditional vacuum for a deeper weekly clean. This combination covers more ground than either type manages alone, without asking one machine to be everything at once, and it often reduces how often either one needs home appliances repair attention, since neither is being pushed beyond what it’s actually built for.

    Summary

    Robot vacuums offer convenience and consistent daily maintenance with modest suction, while traditional vacuums deliver stronger cleaning power at the cost of needing a person to run them. Neither is objectively better, and the right choice, or combination, depends on your flooring, home layout, and how much hands on involvement you actually want. Appliances Repair Blog covers maintenance and troubleshooting for both types, so whichever you choose, or however you combine them, home appliances repair guidance is here when something needs attention.
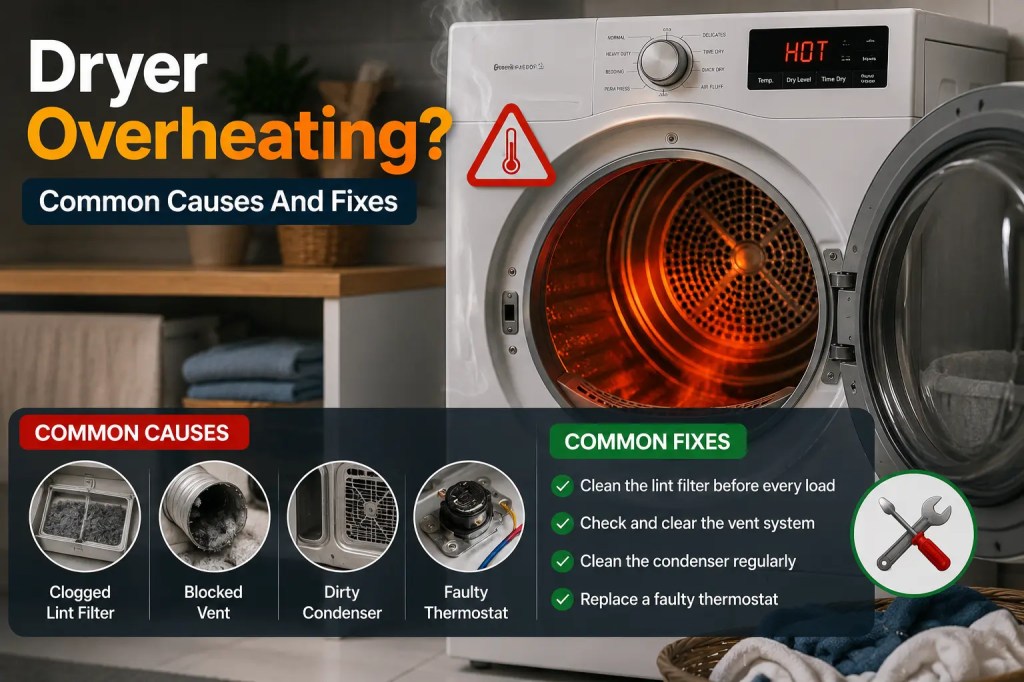
  • Dryer Overheating? Common Causes And Fixes

    Dryer Overheating? Common Causes And Fixes

    A dryer is supposed to produce heat, but it should never become so hot that you hesitate to touch the door or notice a burning smell in your laundry room. If your dryer feels hotter than usual or your clothes come out extremely hot after every cycle, it’s a warning sign that something isn’t working properly. Many overheating problems start small and can often be fixed before they turn into expensive repairs. Regular home appliance repair and routine maintenance are some of the best ways to keep your dryer running safely and efficiently.

    Why Does a Dryer Overheat?

    Dryers rely on a simple process to dry clothes. The heating element warms the air, the blower pushes that hot air through the drum, and the vent carries moisture outside. If any part of this system stops working correctly, heat begins to build up inside the dryer instead of escaping.

    A Clogged Lint Filter

    The lint filter is the first place you should check when a dryer starts overheating.

    Every load of laundry leaves behind tiny fibers that collect on the lint screen. As the filter fills up, airflow becomes restricted. Instead of moving freely through the drum, hot air gets trapped inside the dryer, causing temperatures to rise.

    Cleaning the lint filter after every load only takes a few seconds, but it makes a noticeable difference in both drying performance and safety.

    Even if the screen looks clean, wash it occasionally with warm water and a little dish soap. Fabric softener residue can leave behind a thin film that blocks airflow.

    A Blocked Dryer Vent

    A clean lint filter doesn’t always mean airflow is good.

    Over time, lint also collects inside the dryer vent that carries warm air outside your home. Dust, pet hair, and even bird nests can partially block the vent opening. When moist air can’t escape, heat stays inside the dryer, forcing it to run hotter than normal.

    Some common signs of a blocked dryer vent include:

    • Clothes taking longer to dry.
    • The dryer cabinet becoming unusually hot.
    • A warm or humid laundry room.
    • A burning smell during operation.
    • Weak airflow from the outside vent.

    Cleaning the vent at least once a year can improve efficiency and greatly reduce the chances of overheating.

    Overloading the Dryer

    Trying to dry too many clothes at once may seem like a time-saver, but it often creates the opposite result.

    A packed drum leaves very little space for warm air to circulate. The dryer keeps producing heat, but moisture remains trapped inside the clothing. As the appliance works harder to dry the load, internal temperatures continue to rise.

    For the best performance, avoid filling the drum completely. Clothes should have enough room to tumble freely throughout the drying cycle.

    A Faulty Thermostat

    Your dryer uses a thermostat to regulate temperature while it’s running.

    When the thermostat works properly, it turns the heating element on and off to maintain safe operating temperatures. If it begins to fail, the dryer may continue heating longer than necessary or reach temperatures that are much higher than normal.

    Inconsistent drying performance combined with excessive heat is often a sign that the thermostat should be inspected or replaced.

    A Damaged Heating Element

    Many people assume a damaged heating element simply stops producing heat, but that’s not always true.

    Sometimes the element becomes partially damaged and continues heating continuously instead of cycling on and off. This causes the dryer to become much hotter than intended.

    If delicate clothing begins shrinking unexpectedly or feels unusually hot when the cycle ends, the heating element may be the source of the problem.

    A Damaged Blower Wheel

    The blower wheel is responsible for moving hot air through the drum and out of the vent. If it becomes loose, cracked, or clogged with lint, airflow drops significantly. Heat starts building up inside the dryer instead of leaving through the exhaust system.

    A faulty blower wheel may also cause unusual rattling or humming noises while the dryer is running. If you notice both overheating and strange sounds, this component is worth checking.

    Check the Vent Hose

    Sometimes the problem isn’t inside the dryer at all.

    A vent hose that is crushed behind the appliance or bent too sharply can restrict airflow just like a clogged vent. Pull the dryer away from the wall and make sure the hose has a smooth path without kinks or damage. This simple inspection can improve airflow and help prevent overheating.

    Simple Ways to Prevent Dryer Overheating

    A few minutes of maintenance can save you from expensive repairs later. Here are some simple habits that help keep your dryer running safely:

    • Clean the lint filter after every load.
    • Inspect the dryer vent regularly.
    • Avoid overloading the drum.
    • Leave enough space behind the dryer for proper ventilation.
    • Schedule a professional vent cleaning every year if you use the dryer frequently.

    These small maintenance tasks improve efficiency while reducing wear on the appliance.

    When Should You Call a Professional?

    If your dryer continues overheating after you’ve cleaned the lint filter and checked the vent, the problem may involve internal components such as the thermostat, heating element, or electrical wiring.

    Stop using the dryer immediately if you notice smoke, a strong burning smell, or scorch marks on your clothing. These warning signs shouldn’t be ignored and should be inspected by a qualified appliance repair technician.

    Final Thoughts

    An overheating dryer is usually a sign that airflow has been restricted or that one of its heating components isn’t working properly. Problems like a clogged lint filter, blocked vent, overloaded drum, or faulty thermostat are among the most common causes. Fixing these issues early can improve drying performance, lower energy consumption, and help prevent costly repairs.

    Regular maintenance and timely home appliance repair are the best ways to keep your dryer operating safely for years to come. If basic troubleshooting doesn’t solve the problem, having the appliance professionally inspected is the safest way to protect both your dryer and your home.

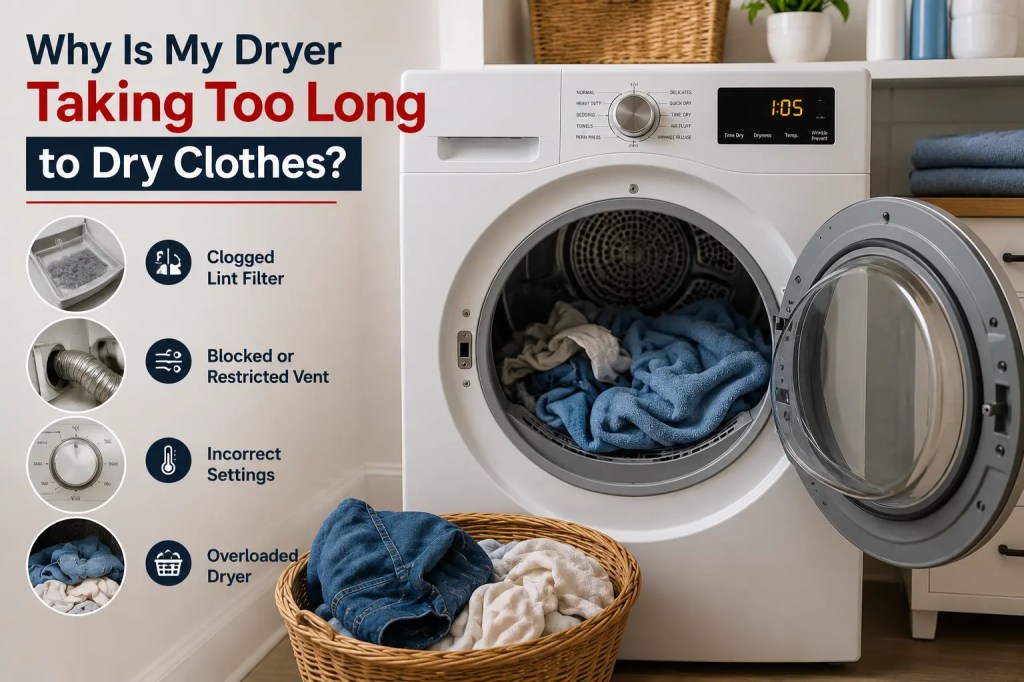
  • Why Is My Dryer Taking Too Long To Dry Clothes?

    Why Is My Dryer Taking Too Long To Dry Clothes?

    You toss a load of wet clothes into the dryer, press the start button, and expect everything to be dry within an hour. Instead, you open the door only to find damp towels, cool jeans, and shirts that still feel slightly wet. So, you run another cycle. If this sounds familiar, you’re definitely not the only one dealing with it.

    A dryer that suddenly takes much longer to dry clothes is one of the most common household appliance complaints. The good news is that it doesn’t always mean the machine is worn out or ready to be replaced. In many cases, the problem comes down to poor airflow, lack of maintenance, or a small faulty part. Keeping up with regular home appliance repair and maintenance can help catch these issues early and keep your dryer working the way it should.

    Don’t Ignore Longer Drying Times

    It’s easy to think, “The dryer still works, so I’ll deal with it later.” But a dryer that’s working harder than normal uses more electricity, puts extra stress on its internal parts, and can shorten the appliance’s lifespan.

    Long drying times can also become a safety concern. When airflow is restricted, heat builds up inside the dryer, increasing the risk of overheating. That’s why it’s always worth investigating the problem instead of simply running another drying cycle.

    The Lint Filter May Be Restricting Airflow

    Ask any appliance technician about the most common dryer problem, and there’s a good chance they’ll mention the lint filter first.

    Every load of laundry leaves behind tiny fibers. While the lint screen catches most of them, it quickly fills up if it isn’t cleaned regularly. Once airflow becomes restricted, warm air can’t move through the clothes efficiently, and moisture stays trapped inside the drum.

    If you already clean the filter regularly, give it a closer look. Fabric softener and dryer sheets can leave behind an invisible film that blocks airflow even when the screen looks clean. Washing the filter occasionally with warm water and a soft brush helps remove this buildup.

    Are You Overloading the Dryer?

    We’ve all done it. Instead of drying two small loads, it’s tempting to squeeze everything into one large load and save time.

    Ironically, doing this often has the opposite effect.

    When the drum is packed with heavy towels, blankets, or piles of clothing, warm air can’t circulate properly. The clothes become tightly packed together, preventing moisture from escaping.

    A Weak Heating Element Can Slow Everything Down

    If your dryer runs for a long time but the clothes never seem to get completely dry, the heating element deserves a closer look.

    In an electric dryer, the heating element is responsible for producing the hot air that removes moisture from your clothes. Like any other part, it can wear out over time. Sometimes it stops working completely, but in many cases it weakens gradually. Because the change happens slowly, you may not notice it right away.

    A dryer with a failing heating element often feels warm, but not as hot as it used to. Clothes eventually dry after two or three cycles, making it easy to assume the appliance is still working normally.

    If you suspect the dryer isn’t producing enough heat, it’s best to have the heating element tested rather than continuing to run multiple drying cycles.

    The Blower Wheel Keeps Air Moving

    Heat alone won’t dry your clothes. The dryer also needs strong airflow.

    Inside the appliance is a blower wheel that pulls air through the heating system, circulates it around your laundry, and pushes moist air out through the vent.

    If the blower wheel becomes loose, cracked, or clogged with lint, airflow drops significantly. Even with a healthy heating element, damp air stays trapped inside the drum, forcing the dryer to work much longer.

    Worn Drum Seals Let Heat Escape

    Around the front and rear of the dryer drum are seals that help keep hot air inside the machine.

    As these seals age, they become brittle or worn. Small gaps begin to appear, allowing heated air to escape before it reaches your clothes.

    The difference may seem small, but losing even a portion of the hot air can noticeably increase drying times. You may also feel warm air leaking around the dryer door while it’s operating.

    Some dryer problems are easy to solve at home, while others require the right tools and experience.

    If you’ve cleaned the lint filter, checked the vent, reduced the load size, and confirmed the correct settings but the dryer still takes far too long to dry clothes, it’s time for a professional inspection.

    You should also seek help if the dryer isn’t producing enough heat, makes unusual noises, gives off a burning smell, or repeatedly shuts off before the cycle is complete. These symptoms often point to electrical or mechanical issues that shouldn’t be ignored.

    Final Thoughts

    A dryer that suddenly needs two or three cycles to dry clothes isn’t just inconvenient—it usually indicates that something isn’t working as efficiently as it should. In many cases, the cause is surprisingly simple, such as a clogged lint filter, restricted vent, overloaded drum, or dirty moisture sensor. Taking care of these small issues early can improve performance and prevent larger repairs later.

    Regular maintenance, timely home appliance repair, and paying attention to warning signs can keep your dryer running efficiently for years. If basic troubleshooting doesn’t solve the problem, having the appliance inspected by a qualified technician is often the smartest investment. Fixing a minor fault today is usually far less expensive than replacing a major component tomorrow.

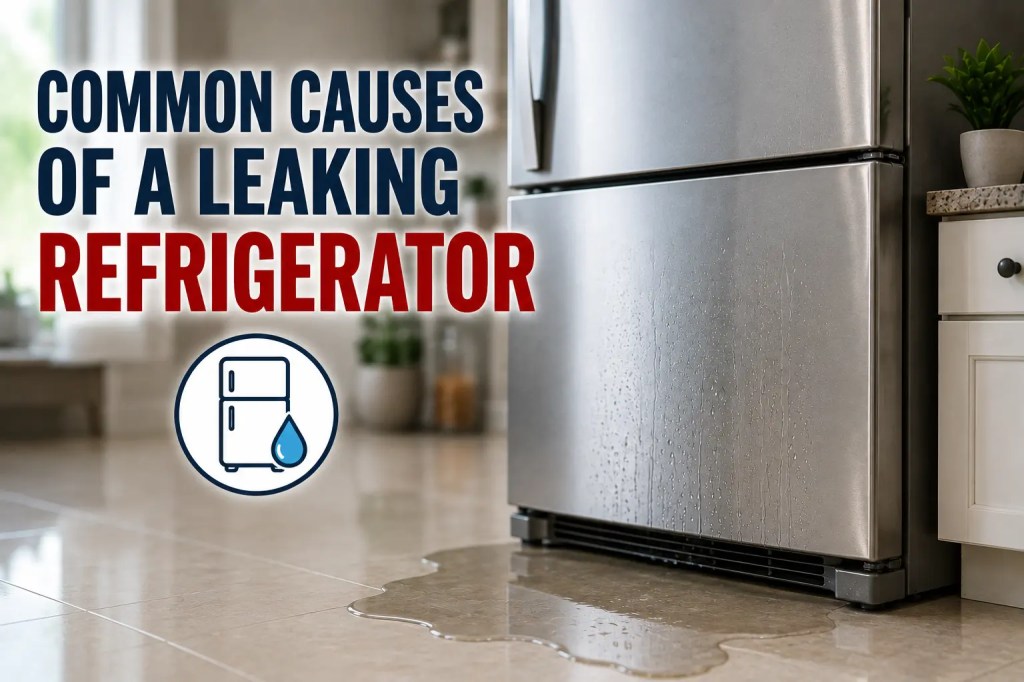
  • Common Causes Of A Leaking Refrigerator

    Common Causes Of A Leaking Refrigerator

    A leaking refrigerator usually comes down to one of five causes: a clogged defrost drain, a damaged water line, a cracked drip pan, a door seal that’s letting in humid air, or a water filter that isn’t seated properly. None of these mean the refrigerator is failing. Here’s how to figure out which one you’re dealing with.

    Check the Defrost Drain First

    This is the single most common source of refrigerator leaks, and it’s worth checking before anything else. Refrigerators with automatic defrost cycles melt frost periodically, and that water is supposed to flow down a small drain tube into a pan underneath the unit, where it evaporates on its own. When that drain gets clogged with food debris, ice buildup, or general grime, the water has nowhere to go and backs up inside the freezer or fridge compartment instead, eventually leaking out onto the floor.

    The drain is usually located at the back of the freezer compartment, sometimes hidden behind a panel. Look for a small hole or opening, often with a rubber flap or cover. A turkey baster with warm water, or a straightened wire, can clear a minor clog. If ice has built up around the drain opening itself, that’s your answer.

    Inspect the Water Line

    Refrigerators with an ice maker or water dispenser connect to your home’s water supply through a thin plastic or copper line running behind the unit. Over time, this line can develop cracks, loosen at a connection point, or get pinched if the fridge was pushed too far against the wall during cleaning or moving.

    Pull the refrigerator out carefully and check the full length of the line for visible cracks, kinks, or moisture around any fitting. A slow drip at a connection point is often fixable just by tightening the fitting. A cracked line itself needs replacing, which is an inexpensive part but does require shutting off the water supply first.

    Look at the Drip Pan

    Beneath most refrigerators sits a shallow drip pan that collects the water draining down from the defrost cycle, letting it evaporate gradually from the warmth of the compressor below. Over years of use, this pan can crack, especially older plastic ones that become brittle with age and heat exposure, or it can simply become misaligned and no longer sit where it’s supposed to catch the water at all.

    Pull it out from underneath the unit and check for visible cracks or damage. A pan that’s just shifted out of position is a quick fix; just slide it back under the drain point. A cracked pan needs replacing, and it’s a straightforward, affordable part on most models.

    Check the Door Seal

    A worn, torn, or poorly sealing door gasket lets warm, humid air from the kitchen into the fridge continuously. That moisture condenses inside, and over time, enough condensation builds up that it can drip and pool, especially near the bottom of the door or along interior walls where the temperature difference is greatest.

    Run your hand around the door seal, feeling for gaps, and check visually for cracking, flattening, or areas where the rubber has pulled away from the door. A dollar bill test works well too: close the door on a bill and see if it slides out easily, which suggests the seal isn’t gripping properly at that spot.

    Water Filter Issues

    If your refrigerator has a built-in water filter for the dispenser or ice maker, a filter that isn’t seated correctly, is cracked, or has a worn O-ring can leak at the filter housing itself. This often shows up as water pooling inside the fridge near where the filter is installed, rather than on the floor beneath the unit.

    Remove the filter, check the O-ring for visible damage or debris, and reseat it firmly, listening or feeling for it to click or lock into place properly. If the O-ring looks worn, replacing it or the whole filter usually resolves this quickly.

    Where the Leak Is Tells You a Lot

    Water pooling inside the fridge or freezer compartment usually points to the defrost drain or a water filter issue. Water on the floor directly underneath the unit often traces back to the drip pan or a water line connection. Water specifically near the bottom of the door suggests the seal is the problem rather than anything internal. Narrowing down the leak’s location before opening anything up saves time.

    When to Call a Professional

    Clearing a defrost drain, reseating a filter, and repositioning a drip pan are all safe, straightforward fixes anyone can handle without needing home appliances repair assistance. Water line replacement is manageable for most people comfortable with basic tools, provided the water supply is shut off first. If you’ve checked all of the above and the leak continues, or if it seems to be coming from inside the refrigeration system itself rather than these external sources, that points to a refrigerant or cooling system issue that requires a trained technician.

    Summary

    Most refrigerator leaks trace back to a clogged defrost drain, a damaged water line, a cracked or misaligned drip pan, a failing door seal, or a water filter that isn’t seated correctly. Identifying where the water is actually appearing narrows down the cause quickly, and the majority of these fixes are inexpensive and manageable without professional home appliances repair help. Appliances Repair Blog covers what to check next if your refrigerator is showing other signs of trouble beyond a leak.

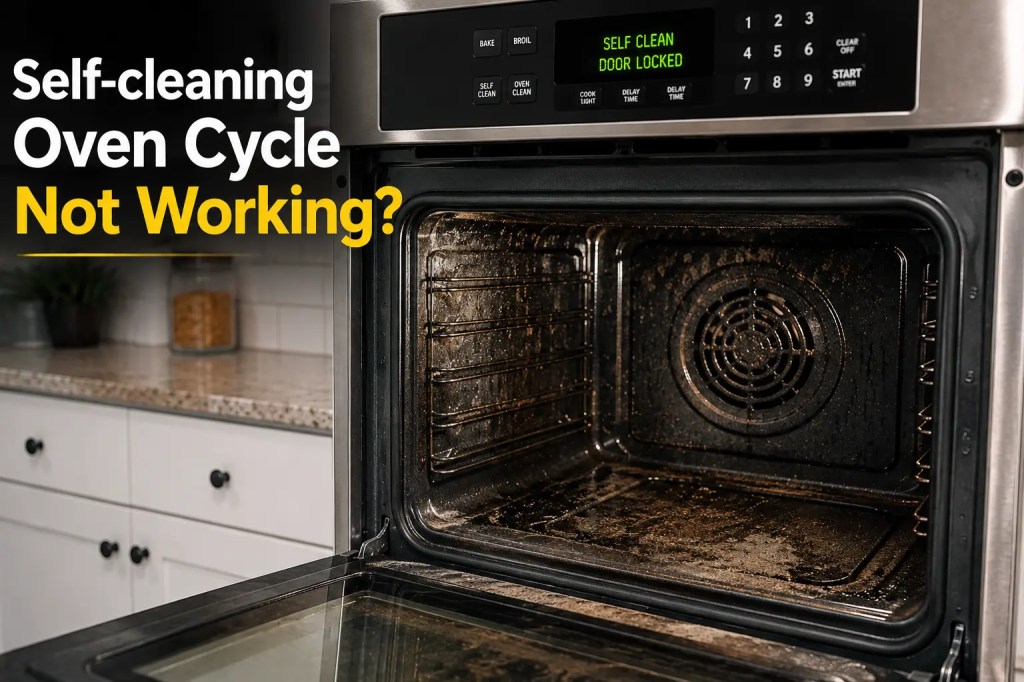
  • Self-cleaning Oven Cycle Not Working?

    Self-cleaning Oven Cycle Not Working?

    A self-cleaning cycle that won’t start, won’t finish, or won’t lock is almost always tied to one of a handful of causes: a door that isn’t fully closed, a failed door lock mechanism, a control board glitch, or a genuine safety lockout triggered by overheating. Here’s how to work through each possibility.

    The Cycle Won’t Start At All

    Most ovens require the door to be completely closed and, on many models, the door lock engaged before the self-cleaning cycle will even begin. If the door isn’t shutting flush, something as simple as a rack left in the wrong position or a small object caught in the door seal can prevent it from closing enough to satisfy the safety sensor.

    Check for anything obstructing the door. Remove all racks unless your manual specifically says to leave one in. Make sure the door closes fully and evenly, with no visible gap on either side.

    If the door closes fine but the cycle still won’t start, check that you’re selecting the mode correctly. Some ovens require pressing and holding a button, or selecting a cleaning duration before the cycle activates, and it’s easy to miss a step buried in a menu you don’t use often.

    The Door Won’t Lock

    Self-cleaning cycles run at extremely high temperatures, often 800 to 900 degrees Fahrenheit, which means the door lock is a genuine safety feature, not just a convenience. Ovens are designed to refuse to start the cycle if the lock mechanism doesn’t engage properly, since running that hot with an unsecured door poses a real risk.

    A door lock that clicks but doesn’t fully engage, or doesn’t click at all, usually points to a worn or misaligned lock motor, a small motorized latch mechanism most ovens use for this specific function. This part can fail independently of everything else in the oven working normally.

    Testing this yourself is limited since the lock mechanism is generally not something to bypass or force manually; doing so risks running the cycle without proper safety engagement. If the lock isn’t engaging, this is typically a job for a technician to diagnose and replace the correct part.

    The Cycle Starts But Stops Partway Through

    An oven that begins self-cleaning but shuts off before finishing is often protecting itself from an internal temperature that’s climbed higher than expected. This can happen if there’s an unusually large amount of grease or food debris inside, since burning that off produces smoke and heat beyond what the cycle anticipated for a normally maintained oven.

    Wipe out loose crumbs, spills, and excess grease before running a self-clean cycle rather than relying on the cycle to handle everything from scratch. This single habit prevents a large share of interrupted cycles.

    If the oven consistently shuts off early even with minimal debris inside, a failing temperature sensor may be reporting an inaccurate reading that triggers a premature safety shutoff, which points back to the same sensor issue that can also cause uneven regular baking.

    Strong Odors or Smoke During the Cycle

    Some smoke and odor during a first self-clean cycle, or one run after a long gap since the last cleaning, is normal, since the process is literally burning off baked-on residue at extreme heat. Persistent, heavy smoke well beyond the first few minutes, or a burning smell that seems electrical rather than food related, is different and worth stopping the cycle for.

    Ventilate the kitchen well during any self-clean cycle regardless, since even a normal cycle produces noticeably more odor and smoke than regular cooking.

    The Control Panel Shows an Error Code

    Many ovens display a specific error code when the self-cleaning cycle fails to start or complete, often related to the door lock, temperature sensor, or control board. Check your manual for what the specific code means for your model, since codes and their meanings vary significantly between manufacturers.

    In many cases, simply powering the oven off at the breaker for a minute or two and restarting it clears a temporary control board glitch, similar to restarting any other appliance with a built-in computer. If the same code reappears consistently, that points to an actual component failure rather than a temporary fault.

    Should You Even Use the Self-Cleaning Cycle?

    Worth mentioning: self-cleaning cycles put real thermal stress on an oven’s components, and some appliance technicians note that older ovens or those already showing minor issues can develop new problems after a high-heat cleaning cycle that a manual cleaning wouldn’t have caused. If your oven is older or has a history of electrical quirks, manually cleaning with a non-abrasive oven cleaner may be the lower-risk option.

    When to Call a Professional

    Door closure issues and light debris buildup are safe to check and address yourself. A lock mechanism that won’t engage, a control board that’s throwing persistent error codes, or a burning electrical smell all warrant a technician, since these involve components tied directly to a high-heat safety system that shouldn’t be worked around.

  • Why Is My Oven Not Heating Evenly?

    Why Is My Oven Not Heating Evenly?

    Uneven oven heating almost always comes down to one of four things: a failing heating element, a bad thermostat or temperature sensor, poor air circulation, or the wrong rack position for what you’re baking. None of these require replacing the oven. Here’s how to figure out which one you’re dealing with and what to do about it.

    Start By Confirming It’s Actually Uneven

    Before diagnosing anything, rule out the obvious. Cookies browning faster on one side of the tray, or a cake rising unevenly, can sometimes just mean the tray itself needs rotating halfway through baking, not that the oven has a real problem. Try baking something simple, a tray of identical cookies spaced evenly, without rotating it. If one side consistently browns faster than the other every single time, that’s a real heating issue worth digging into.

    Check the Heating Elements

    Electric ovens have two elements, one on top for broiling, one on the bottom for baking. A bottom element that’s partially failing will still glow and produce heat, just unevenly or at reduced output, which is easy to miss with a quick glance since it doesn’t necessarily go completely dark.

    Look closely at the element while it’s on. Uneven glowing, dark spots, or visible blistering on the coil are all signs it needs replacing. This is a relatively affordable, straightforward repair on most models, and many people handle it themselves once the oven is unplugged and the old element is unscrewed and disconnected.

    Gas ovens don’t have this exact issue since they use a single burner, but a dirty or partially clogged burner can produce an uneven flame that heats one side of the oven cavity more than the other.

    Test the Temperature Sensor

    Most ovens use a temperature sensor, a small probe usually mounted on the back or side wall of the oven cavity, to regulate heat. If this sensor drifts out of calibration or starts failing, the oven can run hotter or cooler than the display shows, and heat distribution suffers as the oven cycles the element on and off trying to compensate for inaccurate readings.

    An oven thermometer, a cheap, standalone tool placed inside the oven, tells you what’s actually happening versus what the dial claims. Set the oven to 350 and check the thermometer after it preheats. A difference of more than twenty degrees points to a sensor or calibration problem.

    Many ovens include a hidden calibration setting in the control panel that lets you adjust for a consistent offset. Check your manual for the exact steps, since this varies by brand and model.

    Consider Air Circulation

    Ovens without a convection fan rely entirely on heat rising naturally from the element, which means the top of the oven often runs hotter than the bottom, and the back can run hotter than the front depending on the door seal and vent placement. This isn’t a malfunction; it’s just how conventional ovens work, but it explains a lot of uneven baking complaints that people assume are mechanical problems.

    If your oven has a convection setting, using it circulates air with a fan and typically produces much more even results, particularly for multi-rack baking. If you’re dealing with an older oven without this feature, rotating trays halfway through baking largely compensates for the natural unevenness.

    Check the Door Seal

    A worn or damaged door gasket lets heat escape steadily during baking, and the oven compensates by cycling the element more frequently, which can create hot spots near the element and cooler spots farther away as the heat struggles to distribute evenly before escaping.

    Run your hand around the door seal while the oven is preheated, feeling for warm air leaking out. Visible cracking, flattening, or gaps in the rubber gasket are signs it needs replacing, a relatively inexpensive fix that often resolves uneven heating on its own.

    Rack Position Matters More Than People Think

    Even a perfectly functioning oven bakes unevenly if the rack position doesn’t match what’s being cooked. The center rack is the standard default for most baking since it sits in the most even part of the heat zone. Items placed too close to the top or bottom element get direct, concentrated heat that the rest of the oven cavity doesn’t share.

    For multiple trays baked at once, rotating both position and orientation halfway through baking compensates for whatever unevenness the oven’s natural heat pattern creates.

    When to Call a Professional

    Replacing the heating element and door seal is generally a safe DIY repair on most models. Sensor calibration is usually adjustable via the control panel without any tools. If you’ve checked all of this and heating is still inconsistent, especially alongside error codes or a control board that seems to be malfunctioning, that points to a deeper electrical issue better handled by a technician.

    Summary

    Uneven oven heating typically traces back to a failing heating element, an inaccurate temperature sensor, natural air circulation limits, a worn door seal, or simply the wrong rack position for what’s being baked. Working through these one at a time usually identifies the cause quickly, and most of the fixes involved are inexpensive and manageable without professional help. Appliances Repair Blog covers the deeper troubleshooting for oven issues that go beyond these basics.

Appliance Repair Blog

Repair and maintenance guide, reviews, expert suggestions

Street: Sheikh Mohammed Bin Zayed Rd 34, Al Ruwais,

State: Dubai

Country: United Arab Emirates

Design a site like this with WordPress.com
Get started